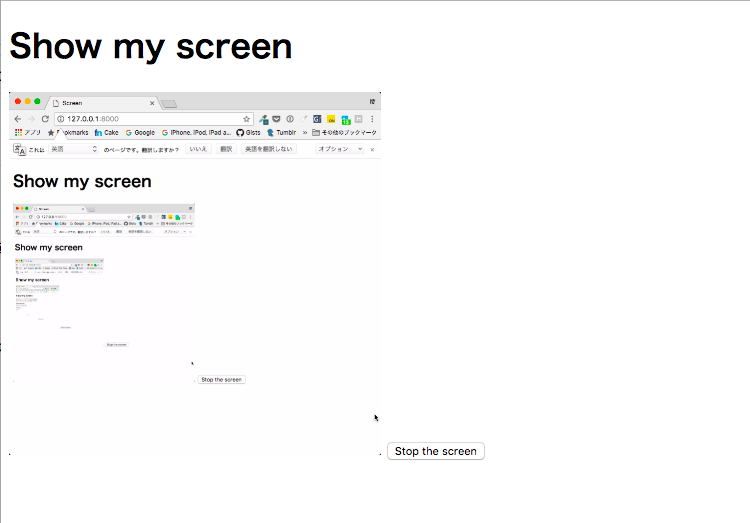
Google Chrome の API を使ってスクリーン共有を行ってみた
twilio BLOG で Google Chrome の API を使ったスクリーン共有機能を javascript で構築するチュートリアルがあったので試してみた。以下の GIF のようなことができる。
画像は twilio BLOG から引用している
必要なもの
- Google Chrome
- 静的ファイルをサーブできるローカルサーバー(今回は Go を使った)
スクリーンの共有
現時点では mediaDevices API から画面上のコンテンツへのアクセスはセキュリティ上多くの懸念点があるためできないとのこと。
しかし、
getDisplayMedia メソッドの仕様ドラフトは存在するため、将来的にサポートされるのかなーと。
こういった制限があるため、現状は Chrome の拡張機能を自分で作成することでアプリケーションウィンドウ、Chrome のタブのリソースへアクセスする権限を得ることが可能らしい。
ということで以下を実行してプロジェクトのディレクトリを作成してディレクトリへ入る。
mkdir screen-capture && cd $_
Chrome の拡張機能を作る
拡張機能を作る場合、manifest.json と extension.js のような javascript ファイルを作成する必要がある。
mkdir extension
touch extension/manifest.json extension/extension.js
まずは拡張機能の説明や設定を書くために manifest.json を開いて以下のように編集した。
{
  "name": "Desktop Capture",
  "description": "スクリーンをシェアしてくれるやつ〜",
  "version": "0.1.0",
  "manifest_version": 2,
  "background": {
    "scripts": ["extension.js"],
    "persistent": false
  },
  "externally_connectable": {
    "matches": ["*://127.0.0.1/*", "*://localhost/*"]
  },
  "permissions": ["desktopCapture"]
}
細かい解説はソース元の記事を読めば分かるが、ここで解説しておきたいことは以下の二つである。
"matches": ["*://127.0.0.1/*", "*://localhost/*"]はブラウザ上で127.0.0.1もしくはlocalhostへアクセスしてもスクリーンの共有機能が使えることを意味している。- desktopCapture API を使うために
"permissions": ["desktopCapture"]を書く必要がある。
拡張機能のコード
これも詳しい説明が書いてるためコードだけ。
拡張機能を書くためによく chrome.runtime が使われているっぽい。
chrome.runtime.onMessageExternal.addListener(
    (message, sender, sendResponse) => {
        const sources = message.sources;
        const tab = sender.tab;
        chrome.desktopCapture.chooseDesktopMedia(sources, tab, streamId => {
            if (!streamId) {
                sendResponse({
                    type: 'error',
                    message: 'Failed to get stream ID'
                });
            } else {
                sendResponse({
                    type: 'success',
                    streamId: streamId
                });
            }
        });
        return true;
    }
);
拡張機能のインストール
chrome://extensions へアクセスする。
アクセスした後以下の画像のようなボタンがあるため、次のことを行う。

これでインストールが完了して以下のような画像が追加される。
(僕がやった時に拡張機能の名前を Hello world にしてしまった)

画像に書いてあるように ID: 値 となっているため、「値」の部分をコピーする。
html を Go でサーブする
最初で静的ファイルをサーブできればいいと紹介したが、それすら面倒だったため以下のようなコードを書いた。超雑...
package main

import (
    "bytes"
    "io"
    "net/http"
)

func render(w http.ResponseWriter, id string) {
    buf := bytes.NewBufferString(`<!DOCTYPE html>
<html lang="ja">

<head>
  <meta charset="UTF-8">
  <meta name="viewport" content="width=device-width, initial-scale=1.0">
  <meta http-equiv="X-UA-Compatible" content="ie=edge">
  <title>Screen</title>
</head>

<body>
  <h1>Show my screen</h1>

  <video autoplay id="screen-view" width="50%"></video>
  <button id="get-screen">Get the screen</button>
  <button id="stop-screen" style="display:none">Stop the screen</button>

  <script>
  (() => {
      const EXTENSION_ID = '`)
    buf.WriteString(id)
    buf.WriteString(`';
      const video = document.getElementById('screen-view');
      const getScreen = document.getElementById('get-screen');
      const stopScreen = document.getElementById('stop-screen');
      const request = { sources: ['window', 'screen', 'tab'] };
      let stream;
      getScreen.addEventListener('click', event => {
          chrome.runtime.sendMessage(EXTENSION_ID, request, response => {
              if (response && response.type === 'success') {
                  navigator.mediaDevices.getUserMedia({
                      video: {
                          mandatory: {
                              chromeMediaSource: 'desktop',
                              chromeMediaSourceId: response.streamId,
                          }
                      }
                  }).then(returnedStream => {
                      stream = returnedStream;
                      video.src = URL.createObjectURL(stream);
                      getScreen.style.display = "none";
                      stopScreen.style.display = "inline";
                  }).catch(err => {
                      console.error('Could not get stream: ', err);
                  });
              } else {
                  console.log(response)
                  console.error('Could not get stream');
              }
          });
      });
      stopScreen.addEventListener('click', event => {
          stream.getTracks().forEach(track => track.stop());
          video.src = '';
          stopScreen.style.display = "none";
          getScreen.style.display = "inline";
      });
  })();
  </script>
</body>

</html>`)
    io.Copy(w, buf)
}

func main() {
    id := "値" // ここにさっきコピーした値を書く
    mux := http.NewServeMux()
    mux.HandleFunc("/", func(w http.ResponseWriter, r *http.Request) {
        render(w, id)
    })
    http.ListenAndServe(":8000", mux)
}
Go が微妙な方はさっきコピーした ID の値と html を文字連結して、それをレンダリングしているんだなという程度で見てもらえればいいかなと思う。このファイルを main.go として保存する。
最終的に go run main.go
そして Chrome 上で http://127.0.0.1:8000 へアクセス。こういう画面になる。

Get the screen をクリックすると以下のようなウィンドウが現れる。

これで好きなものを選択すると...

できた!!!!
